
Views: 0 Author: Site Editor Publish Time: 2026-10-11 Origin: Site


The commercial printing industry is rapidly adopting UV transfer technology. This operational shift moves away from traditional direct-to-substrate printing toward highly versatile decal production. Now, you can apply vibrant graphics to almost any rigid surface without specialized jigs. However, many print shops struggle when transitioning to this new method. Misunderstanding the distinct roles of transfer films leads to wasted consumables. It causes poor adhesion and reduces your hardware efficiency. Operators often confuse the specific handling requirements of the base substrate and the transfer carrier. You need a solid grasp of material science to avoid these costly production pitfalls.
In this article, we provide a technical breakdown of how these films interact. You will learn about implementation realities and standard operating procedures. We will explore the step-by-step production workflow in detail. Finally, we will help you evaluate the right equipment for scalable, high-quality decal production.
Distinct Functions: The A film acts as the print base and holds the adhesive, while the B film serves strictly as the transfer carrier and protective layer.
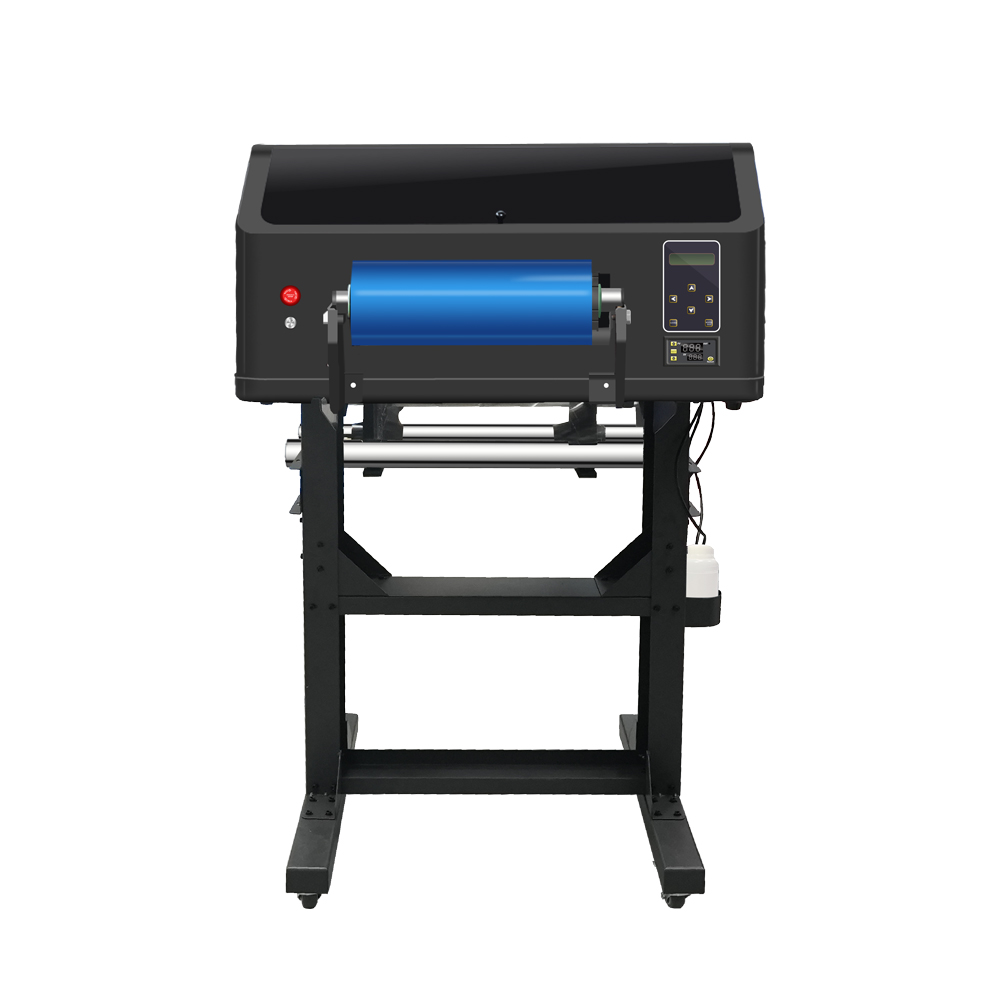
Hardware Dependency: Optimal results require precise tension and temperature control, often dictating the choice between an all-in-one UV DTF Printer with an integrated laminator or a dual-machine setup.
Consumable Synergy: Print durability relies heavily on matching the correct UV ink sets (e.g., TPU vs. standard rigid) with the specific coating of the UV DTF A Film.
Quality Control: The most common production failures occur during the lamination phase (A to B film bonding), making environmental control and equipment calibration critical.
Understanding the physical structure of your transfer materials is the first step toward predictable production. These two films look similar at a glance. However, they perform entirely different chemical and mechanical functions.
The A film serves as the foundational base for your entire print job. Manufacturers typically construct it from a highly stable PET (polyethylene terephthalate) plastic. They coat this plastic with a specialized release agent. In most modern systems, you will also find a pre-applied layer of adhesive directly on top of this release coating. You load this film directly into your hardware. It receives the white ink, color ink, and clear varnish directly from the printheads.
The industry currently debates the merits of two distinct A film variations. Some operators prefer standard pre-glued variants. Others experiment with emerging "glue-less" A films. Glue-less systems require your printer to jet a liquid adhesive through a dedicated printhead channel. This approach offers precise glue placement. However, jetting adhesive poses significant risks to printhead longevity. Adhesives cure rapidly and clog nozzles easily. Pre-glued UV DTF A Film eliminates this mechanical risk entirely. It keeps sticky compounds away from your delicate printhead manifolds.
The B film functions entirely as a secondary utility layer. It is a transparent transfer film equipped with a strong adhesive backing. It never passes under your printheads. Instead, it enters the workflow during the post-print lamination stage.
Its role in production is straightforward but highly critical. The laminator presses the B film aggressively against the freshly printed A film. The B film applies massive pressure to the printed design. When you eventually peel the films apart, the B film lifts the ink layers and the underlying adhesive cleanly off the A film backing. This action creates the final, ready-to-apply decal.
Executing a flawless transfer requires strict adherence to a multi-phase workflow. Small deviations in software setup or hardware calibration will ruin your final output. You must follow these standard operating procedures carefully.
Software Preparation: You must configure your RIP software to output layers in a highly specific sequence. The printer must lay down a solid white base first. It then prints the CMYK color layers directly over the white base. Finally, it applies a protective varnish layer on top.
Printhead Clearance: You must adjust the physical carriage height. The printheads need to sit close enough to the A film substrate to prevent ink misting. They must remain high enough to avoid striking the film surface.
Curing Parameters: You must set the UV LED lamps to the correct intensity. The lamps must cure the white and color layers instantly. They must also partially cure the varnish layer to maintain flexibility before lamination.
Once printing finishes, you move immediately to lamination. Operators frequently debate cold versus warm lamination. Warm lamination generally provides superior results. A heated laminator roller gently softens the pre-applied adhesive on the A film. This heat activation encourages a stronger bond between the ink and the B film carrier.
Tension rollers play a massive role during this phase. Uneven tension allows air to trap between the layers. This creates micro-bubbles in your final decal. Proper tension control prevents registration shifts. It keeps the heavy B film perfectly aligned with the delicate printed A film.
Applying the finished decal requires strict surface preparation. You must clean hard substrates thoroughly. Glass, metal, and acrylic surfaces require an isopropyl alcohol wipe to remove finger oils and dust. Any surface contamination will prevent the adhesive from bonding permanently.
Peel techniques also dictate your success rate. Most operators utilize a cold peel method. You apply the decal using firm pressure. You wait a few moments for the adhesive to grab the hard substrate. You then peel the UV DTF B Film away at a sharp 180-degree angle. This sharp angle forces the carrier to release the ink layers smoothly without tearing.
Your hardware only performs as well as the liquids and films you put into it. You must carefully match your consumable chemistry to your intended end-use applications.
You can choose between highly flexible TPU inks and standard hard UV inks. TPU formulations contain elastic polymers. They stretch and bend without cracking. Standard hard UV inks cure into a rigid, scratch-resistant shell. You apply both types directly to your A film.
Your ink flexibility dictates your product possibilities. Curved tumblers and rounded helmets demand TPU inks. The ink must wrap around the curve without fracturing. Flat signage and simple acrylic awards work perfectly with standard hard inks. Hard inks offer superior abrasion resistance on flat surfaces.
Ink Type | Primary Characteristic | Best For Substrates | Cracking Risk on Curves |
|---|---|---|---|
Standard Hard UV Ink | Maximum scratch resistance | Flat glass, metal signs, awards | High |
TPU Flexible UV Ink | High elasticity and stretch | Tumblers, helmets, curved plastics | Low |
Pre-glued A films feature a delicate balancing act. The adhesive must be weak enough to release cleanly from the PET liner during lamination. It must simultaneously be strong enough to hold the wet ink droplets in place during the printing phase. Poorly formulated adhesives fail at one of these two extremes.
You must also monitor the shelf life of your pre-glued films. High environmental humidity degrades adhesive viability quickly. The glue absorbs ambient moisture. It becomes cloudy and loses its tackiness. You should store all raw films in climate-controlled environments. Maintain a relative humidity between forty and sixty percent to ensure consistent performance.
Even experienced operators encounter mechanical and chemical failures. You need to diagnose these issues quickly to prevent massive batch losses. Most problems originate from environmental inconsistencies or poor machine calibration.
Silvering occurs when tiny air pockets become trapped between your A and B films. These pockets look like shimmering silver dots across your dark graphics. They ruin the visual appeal of the decal. Uneven laminator pressure usually causes this defect. Environmental dust settling on the wet ink also creates air gaps. Mismatched film tension pulls the films apart slightly just before the pinch rollers.
You can mitigate these issues easily. Clean your lamination rollers daily with lint-free cloths. Maintain strict climate control to reduce static electricity. Static attracts dust directly to the A film. Adjust your pneumatic laminator pressure to ensure even contact across the entire roll width.
Sometimes your beautiful design stays stuck on the A film backing. Other times, it refuses to release from the B film during the final application. This tearing ruins the decal completely. You must diagnose your varnish curing parameters to fix this.
Under-cured varnish remains soft and sticky. It bonds too aggressively to the B film. Over-cured varnish becomes brittle. It shatters when you try to peel the films apart. You must calibrate your UV lamp intensity. Check your manufacturer guidelines to find the optimal curing wattage for your specific varnish brand.
A printhead strike is the most expensive failure in any print shop. Film edges naturally want to curl upward. If the film curls too high, the fast-moving carriage slams into the plastic. This collision destroys the delicate nozzle plates on your printheads.
You must prevent curled A film edges at all costs. Store your rolls vertically to maintain edge integrity. More importantly, adjust your vacuum table settings. The vacuum must pull the film perfectly flat against the platen. Increase the suction power if you notice any edge lifting during the print run.
Purchasing the right equipment dictates your daily operational friction. You must evaluate your production volume and available floor space before committing to a specific machine architecture.
You essentially have two architectural choices. You can buy an all-in-one roll-to-roll machine with an integrated laminator. Alternatively, you can purchase a standard flatbed printer and a separate standalone lamination machine.
All-in-one roll-to-roll machines dominate high-volume commercial print shops. They offer incredible throughput. The machine prints the A film and immediately feeds it into a heated lamination module. The B film applies automatically. You get a finished roll of decals ready for cutting. This setup maximizes production efficiency and yield. It requires minimal operator intervention.
A dual-machine setup works better for smaller shops. You print sheets of A film on a flatbed. You then carry those sheets to a manual laminator. This method consumes more labor time. However, it allows you to use your flatbed for traditional direct-to-object printing when you are not making decals.
You must inspect several critical mechanical features before buying a UV DTF Printer. Look closely at the tension control systems. High-quality machines use dual servo motors to maintain perfect roll-to-roll stability. Poor tension control ruins long print runs.
Examine the printhead configurations carefully. You need dedicated channels for white ink and varnish. Systems that share channels cannot produce the required opacity and gloss simultaneously. Finally, review the maintenance requirements. Advanced machines feature automated cleaning stations. They prevent stray adhesive and ink vapor from building up near the intense UV curing lamps.
Mastering this decal production process requires a shift in perspective. You must view the A film, B film, inks, and your specific UV DTF Printer as a closed, interdependent ecosystem. Changing one variable affects the entire mechanical workflow.
We highly recommend establishing rigid standard operating procedures for your print shop. Build these SOPs around the specific behaviors of your chosen films. Document your exact vacuum settings, lamp intensities, and laminator temperatures. This documentation ensures predictable production margins and eliminates operator guesswork.
Take action today to improve your production quality. We encourage you to request sample transfers from different material suppliers. Test them on your target substrates. View detailed equipment spec sheets to compare tension control systems. Contact a technical sales rep to evaluate which hardware setup best fits your commercial volume.
A: No. Traditional DTF printers utilize aqueous textile inks designed to absorb into fabric. They cure using dry heat presses. UV DTF systems require specialized UV-curable resins. These resins sit on top of a release liner and cure instantly under high-intensity ultraviolet LED lamps. The chemistries and curing hardware are completely incompatible.
A: Yes, but only in rare edge cases. You can manually apply B film to pre-printed decals or screen-printed transfers to act as a carrier tape. However, for commercial decal production, you strictly require digital UV printing hardware to lay down the necessary white, color, and varnish layers.
A: Printed decals generally remain viable for three to six months. Shelf life depends entirely on your environmental storage conditions. High humidity degrades the adhesive rapidly. Extreme heat causes the varnish to become brittle. Store your unapplied decals in a cool, dry, dark environment to maximize their usable lifespan.
A: Yes. Glue-less A films exist. These require direct-to-film adhesive printing. Your printer must jet liquid glue through a dedicated printhead channel directly onto the design. Standard pre-glued A film systems are far more common. Pre-glued films eliminate the risk of adhesive clogging your expensive printhead nozzles.


