Views: 0 Author: Site Editor Publish Time: 2025-07-12 Origin: Site


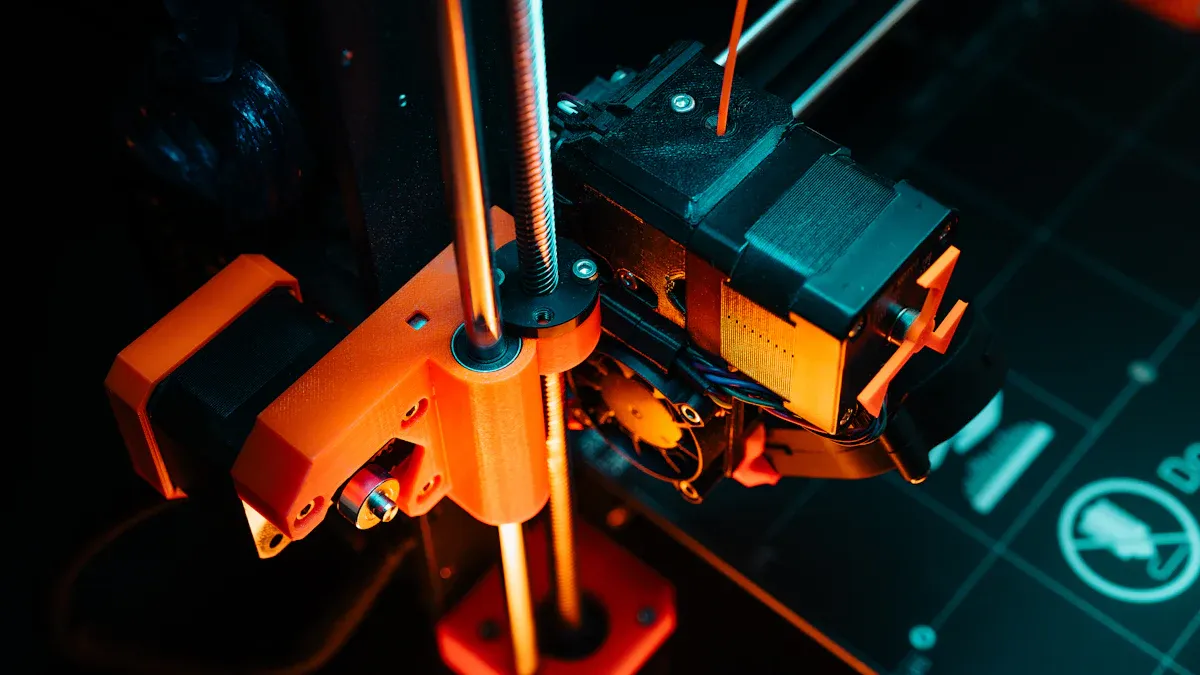
You need to cure dtf powder at a temperature between 320°F and 350°F (160°C–180°C) in your oven. The right time for this process is usually 2–3 minutes. Using a dtf oven helps you get strong and lasting prints. The powder must melt smoothly to stick well to the film. Many beginners and small businesses find this method easy to follow. A DTF Oven makes the cure even and reliable.
Set your DTF oven between 320°F and 350°F. Cure the powder for 2 to 3 minutes. This helps make prints strong and last longer. Preheat your oven for 5 to 10 minutes. This makes sure the heat is even. It also helps stop uneven curing. Put the printed film powder-side up on a tray. Use a tray that can handle heat. Place fresh parchment paper under it so it does not stick. If you use a tray oven, turn the tray halfway through. This helps the powder melt evenly. Let the film cool all the way on a flat, safe surface. Do not touch it until it is cool to avoid damage. Look for a smooth, matte, and clear finish. Make sure there are no sticky or powdery spots. This shows the curing is done right. Do not cure too long or too short. Use a timer and watch the oven temperature closely. Wear safety gear like heat-resistant gloves and a face mask. Keep your workspace clean for the best results.
You want every print to look the same. A DTF oven helps you get this result. The oven keeps the temperature steady during the curing process. You do not have to worry about hot or cold spots. Each transfer gets the same amount of heat. This means your prints will have the same quality every time. You can trust that your dtf prints will stick well to the film. When you use a curing oven, you avoid mistakes that can happen with other methods. You do not need to watch the oven all the time. The process stays the same for each batch.
Tip: Set your oven to the right temperature before you start. This helps you get even results for every print.
A dtf oven saves you time and effort. Many ovens use a conveyor belt system. You can place several transfers on the belt at once. The oven moves them through the heat by itself. You do not need to stand by and check each print. This hands-free operation lets you do other tasks while the oven works. Some ovens even have powered exhaust systems. These remove fumes and moisture, so you do not need a separate exhaust hood. You can cure many transfers in a row without stopping. This makes your work faster and more productive.
Benefits of using a dtf oven for efficiency:
Automated operation frees up your time.
Uniform curing with precise temperature control.
Less risk of burning your transfers.
Good for high-production shops and growing businesses.
You may pay more for a dtf oven at first, but you save money over time. The automation and speed help you finish more jobs with less manual labor.
Even heating is one of the biggest benefits of a dtf oven. The oven spreads heat across the whole tray or conveyor. Each part of your transfer gets the same amount of heat. This helps the dtf powder melt smoothly and stick to the film. You do not get uneven spots or patches. Other curing methods, like heat presses, can leave some areas undercured or overcured. With a dtf oven, you get a smooth, even finish every time.
Note: Always check that your oven reaches the right temperature before you start curing. This step helps you avoid problems with uneven melting.
A curing oven gives you control and peace of mind. You know your transfers will come out right, batch after batch.
You need a reliable dtf oven to cure your powder and get the best results. The oven heats the powder on your film so it melts and sticks well. When you choose a dtf oven, look for one that fits your print size and can handle several prints at once. This helps you work faster and makes your process more efficient.
Here are some important features to consider when picking an oven for your dtf projects:
Print size and capacity: Make sure the oven fits your largest print and can cure multiple prints at the same time.
Temperature control and uniformity: Choose an oven with precise temperature settings and even heat. This gives you consistent results.
Curing time and efficiency: Look for ovens with adjustable timers and energy-saving features.
Safety features: Pick an oven with automatic shut-off and good ventilation.
Ease of use and maintenance: Simple controls and easy cleaning help you work better.
Brand reputation and customer reviews: Research brands to find reliable options.
Warranty and support: Check for a good warranty and helpful customer service.
Budget and ROI: Balance the cost of the oven with the benefits it brings to your dtf business.
Tip: Always preheat your oven before curing powder. This step helps you get even results every time.
A heat-resistant tray holds your film steady while the powder cures in the oven. You place your printed film, powder side up, on this tray. The tray must handle high temperatures without warping or melting. Metal trays work best because they spread heat evenly. Using a sturdy tray keeps your film flat and prevents the powder from shifting during curing. This helps you avoid uneven melting and makes your transfers look better.
Parchment paper is a simple but important tool for dtf curing. You place it between the tray and your film to stop the powder from sticking to the tray. Parchment paper can handle high heat and does not burn easily. It also helps you remove the film from the tray without damaging your print. Always use clean parchment paper for each batch to keep your prints smooth and free from marks.
Here is a table showing the essential tools you need for curing dtf powder and their typical costs:
Essential Tool | Purpose | Typical Cost Range |
|---|---|---|
Curing Oven | Cures adhesive powder on printed film to ensure strong bond with fabric | $500 - $1,000 (Basic), $1,000 - $9,000 (Professional) |
Heat Press | Transfers printed designs from film to fabric | $200 - $500 (Basic), $500 - $9,000 (Professional) |
DTF Printer | Core equipment for printing designs (not directly for curing) | $1,000 - $3,000 (Entry-Level), $3,000 - $10,000 (Mid-Range), >$20,000 (High-End) |
Adhesive Powder | Consumable needed for curing process | $20 - $50 per kilogram |
Cleaning Supplies | Maintenance of equipment | $10 - $30 per month |
Note: Investing in the right tools helps you get strong, long-lasting dtf transfers and saves you time in the long run.
When you set up your DTF curing area, you need more than just an oven, tray, and parchment paper. These extra tools help you work safely, keep your workspace clean, and make your curing process smoother. Here are some other essentials you should have on hand:
Heat-Resistant Gloves
You handle hot trays and film during curing. Heat-resistant gloves protect your hands from burns. Choose gloves that fit well and let you grip items easily.
Face Mask
DTF powder can create fine dust. When you pour or move the powder, you might breathe in small particles. A simple face mask keeps your lungs safe. Use a mask every time you handle powder or open the oven.
Protective Apron
Powder and ink can stain your clothes. A protective apron keeps your clothing clean. You can wash or wipe it down after each use.
Soft Brush or Small Vacuum
Powder can spill on your work table or oven. A soft brush or a small vacuum helps you clean up quickly. Keeping your area tidy prevents powder from sticking to unwanted places.
Digital Thermometer
Oven displays are not always accurate. A digital thermometer lets you check the real temperature inside your oven. You can place the probe near your film to make sure you reach the right heat for curing.
Timer or Stopwatch
Timing matters when you cure DTF powder. Use a timer or stopwatch to track the curing time. This helps you avoid overcuring or undercuring your transfers.
Tweezers or Tongs
Sometimes you need to move the film or adjust its position in the oven. Tweezers or tongs let you do this without touching the hot surface.
Lint-Free Cloths
Dust and lint can ruin your prints. Wipe your film and tray with a lint-free cloth before you start. This keeps your transfers clean and sharp.
Tip: Set up a small storage box or drawer for your DTF tools. Keeping everything in one place saves time and helps you stay organized.
Here is a quick table to help you remember these essentials:
Tool | Purpose |
|---|---|
Heat-Resistant Gloves | Protects hands from hot surfaces |
Face Mask | Prevents inhaling powder dust |
Protective Apron | Shields clothes from stains |
Soft Brush/Vacuum | Cleans up spilled powder |
Digital Thermometer | Checks oven temperature |
Timer/Stopwatch | Tracks curing time |
Tweezers/Tongs | Moves film safely |
Lint-Free Cloths | Removes dust and lint |
You do not need expensive tools to get started. Simple, everyday items can make your DTF curing process safer and more reliable. When you use the right essentials, you protect yourself and improve your results.
You always want to start with a warm oven. Preheat your oven for 5 to 10 minutes before you begin the curing process. This step helps you reach the right temperature for your DTF powder. When you preheat your oven, you make sure the heat spreads evenly inside. Use a thermometer or a heat gun to check the temperature. The oven should reach between 230°F and 250°F (110°C–120°C) before you place your film inside. This lower preheating range helps the oven stabilize. Once you confirm the oven is ready, you can move to the next step. Skipping preheating can lead to uneven curing and weak transfers.
Tip: Always check the oven temperature before you start. A steady temperature gives you better results.
After preheating, you need to set the oven temperature for curing. The best range for curing DTF powder is 320°F to 350°F (160°C–180°C). This range works for most DTF ovens and helps the powder melt smoothly. Use the oven’s control panel to adjust the settings. Some ovens have digital displays, while others use dials. Always double-check the temperature with a digital thermometer. Place the thermometer near the middle rack, away from the heating elements. This spot gives you the most accurate reading.
Here is a quick guide for oven settings:
Step | Action |
|---|---|
Preheat | 230°F–250°F (110°C–120°C) for 5–10 min |
Set for Curing | 320°F–350°F (160°C–180°C) |
Check Temperature | Use thermometer for accuracy |
You want to avoid hot or cold spots. If your oven has a fan, turn it on for better air flow. This helps the temperature stay even. The right oven temperature makes the powder turn clear and shiny. If you see dry or powdery spots, the oven may not be hot enough.
Note: Follow your dtf oven settings guide for the best results. Each oven can work a little differently.
Before you cure your DTF powder, you need to prepare the film. Place your printed film on a heat-resistant tray. Make sure the ink and powder side faces up. Lay a sheet of parchment paper under the film. This step keeps the powder from sticking to the tray. Smooth out the film so it lies flat. If the film curls or bends, the powder may not cure evenly.
Check that the powder covers all the printed areas. If you see gaps, add a little more powder and shake off the extra. Use a lint-free cloth to wipe away dust from the tray and film. Clean surfaces help you get sharp, clean transfers.
Tip: Always use fresh parchment paper for each batch. Old paper can leave marks or cause sticking.
When you follow these steps, you set up your oven and film for the best curing results. Good oven settings and careful preparation help you get strong, smooth DTF transfers every time.
You start the curing process by placing your dtf printed film on the heat-resistant tray. Make sure the ink and powder side faces up. This position helps the powder melt evenly. Lay the film flat so it does not curl or shift during curing. If you use a conveyor oven, place each sheet carefully on the moving belt. For a tray oven, space the films so they do not touch each other. This step prevents the powder from sticking to other prints.
Always use parchment paper under the film. This layer keeps the powder from sticking to the tray or belt. Double-check that the oven has reached the correct temperature before you insert the tray. You want the oven to stay between 320°F and 350°F. This range works best for melting the white adhesive powder and helps you cure dtf powder the right way.
Tip: Wear heat-resistant gloves when you handle the hot tray. This safety step protects your hands from burns.
Curing time is one of the most important curing steps. You need to bake the film for 2 to 3 minutes. This time range works for most dtf ovens and powder types. Set a timer as soon as you place the tray in the oven. Watch the film closely during this curing step. The powder will start to melt and turn glossy. You want the powder to look smooth and clear, not dry or grainy.
If you under-cure, the powder will not stick well to the film. Over-curing can make the powder brittle or cause yellowing. Always follow the recommended curing time for your powder and oven. Some ovens may need a little more or less time, so check your results often.
Here is a quick table to help you remember the right curing time:
Oven Type | Curing Time |
|---|---|
Conveyor Oven | 2–3 minutes |
Tray Oven | 2–3 minutes |
Note: If you use a thicker layer of powder, you may need to add 10–20 seconds to the curing time.
You want every part of your dtf film to cure evenly. Some ovens have hot spots or uneven airflow. To fix this, rotate the tray halfway through the curing process. Use tongs or heat-resistant gloves to turn the tray 180 degrees. This simple step helps the powder melt the same way on all sides.
If you use a conveyor oven, the belt moves the film through the heat. You do not need to rotate the film in this case. For a tray oven, always check the film after the first minute. If you see uneven melting, rotate the tray and finish the curing time.
Tip: Rotating the tray during curing dtf powder in an oven gives you a smooth, professional finish.
When you follow these curing steps, you get strong, durable dtf transfers. The curing process helps the powder bond to the film and prepares it for pressing onto fabric. Always check that the powder has melted and looks shiny before you remove the film from the oven.
After you finish the curing process, you need to let your film cool down. Cooling is a key step if you want strong and clean transfers. When you remove the film from the oven, it will feel hot and soft. If you touch or move the film right away, you might damage the melted powder or cause smudges.
Set the tray with the cured film on a flat, heat-safe surface. Do not stack films on top of each other. Give each sheet enough space so air can flow around it. This helps the film cool faster and keeps the powder smooth.
Tip: Wait until the film feels cool to the touch before you handle it. This usually takes 2–5 minutes, depending on your room temperature.
You can use a small fan to speed up the cooling process. Place the fan a few feet away from the tray. Make sure the airflow is gentle. Strong wind can blow dust onto your film or move the powder before it sets.
Here are the steps you should follow after you cure dtf powder:
Remove the tray from the oven using heat-resistant gloves.
Place the tray on a flat, heat-safe surface.
Let the film cool for several minutes.
Check the film by gently touching the edge. If it feels cool, you can handle it.
Store the cooled film in a clean, dust-free area until you are ready to press it onto fabric.
If you skip the cooling step, you risk ruining your transfer. The powder may not bond well, or the design could peel off later. Cooling helps the powder set and gives you a strong, lasting result.
Note: Never rush the cooling process. Patience here leads to better quality and fewer mistakes.

You can spot many signs with your eyes when curing dtf powder. Look at the surface of your print. A fully cured film will have a smooth and even look. The powder should appear clear and blend well with the ink. If you see any dull, powdery, or flaky spots, the curing did not finish. These areas may peel off later. A good sign is a matte finish on the print. This means the adhesive powder melted and bonded with the ink. If you notice any unmelted powder, you need to cure it longer. Always check for these visual cues before moving to the next step.
Tip: Use a bright light to help you see small details on the film. This makes it easier to spot uncured powder.
Touching the surface gives you more clues about dtf powder curing. When you run your finger gently over the cured film, it should feel smooth. You should not feel any loose powder or sticky spots. If the surface feels soft, oily, or leaves residue on your finger, the curing process is not complete. A fully cured print will not feel gritty or rough. The powder should blend into the ink, leaving no bumps or powdery patches. Always let the film cool before you touch it. Hot film can feel softer and may give you the wrong impression.
Here is a quick table to help you remember what to feel for:
Surface Feel | What It Means |
|---|---|
Smooth and dry | Properly cured |
Sticky or oily | Needs more curing |
Gritty or powdery | Not fully cured |
You want to make sure your print is ready before you press it onto fabric. Testing for proper cure helps you avoid problems later. Start by checking the temperature of the film with a heat gun or infrared thermometer. Uneven heating can leave some spots undercured. Next, try a gentle scratch test on the edge of the film. If the powder flakes off, you need more curing time. You can also flex the film slightly. A cured print will not crack or peel. Always look for a clear, matte finish and a smooth feel. These signs show that the powder has melted and bonded well.
Here are some steps you can follow when testing for proper cure:
Visually inspect the surface for dullness, powderiness, or flaking.
Touch the film to check for softness or oiliness.
Use a thermometer to check for even heating.
Look for a matte finish and clear, blended powder.
Feel for a smooth surface with no residue.
Note: Careful testing at this stage saves you time and prevents wasted transfers. Always check your work before moving to the next step.
Overcuring happens when you leave your film in the oven for too long or set the temperature too high. This mistake can cause several problems with your finished transfer. You might see cracks or breaks in the powder finish. Sometimes, the color looks off or the surface feels rough. Thinner parts of your design can cure faster than thicker parts, which leads to uneven results. If you overcure, you may need to redo your work because the finish will not last.
Overcuring can cause:
Cracks and breaks in the finish
Color and surface defects
Weak performance of the transfer
Tip: Always set your timer and check the thickest part of your design. The curing time should be just enough for the powder to melt and bond, but not longer.
Undercuring is another common mistake when curing dtf powder. If you do not cure the powder long enough or use too low a temperature, the powder will not melt fully. You may notice that the powder feels gritty or powdery after cooling. Sometimes, the transfer peels off the fabric after washing. Undercured powder does not stick well and can ruin your print.
You can avoid undercuring by:
Using a timer for every batch
Checking that the oven reaches the right temperature before starting
Looking for a smooth, matte finish on the film
If you see any powder left on your finger after touching the film, you need to cure it longer.
Uneven melting often happens when the oven does not heat evenly. Hot or cold spots inside the oven can cause some parts of your transfer to cure faster than others. You might see shiny areas next to dull or powdery spots. This problem can make your transfers look patchy and weak.
Here are steps you can take to prevent uneven melting:
Use a heat-resistant thermometer to check for hot or cold spots in your oven.
Place your film away from cold spots and adjust its position if needed.
Keep the curing temperature between 320°F and 350°F.
Use high-quality powder that matches your film and ink.
Cure for 2–3 minutes, as recommended.
Store your powder in a dry place to keep out moisture.
Clean your oven often to remove any residue.
Regular cleaning and careful setup help you get even results every time you cure your transfers.
Making these small changes can help you avoid the most common mistakes when curing dtf powder. You will get stronger, longer-lasting transfers and save time on rework.
You may notice that your DTF transfers do not look right after curing. Sometimes, the problem comes from the oven temperature. Always check the temperature before you start. Use a digital thermometer or thermal stickers to make sure the oven heats evenly. If you see that some areas cure faster than others, recalibrate your oven. Place the thermometer in different spots inside the oven to check for hot or cold zones. Adjust the settings until you see even heat across the tray.
Routine maintenance helps keep your oven working well. Wipe the inside walls with isopropyl alcohol to remove any residue. Inspect the heating elements and clean them if needed. If you use a digital oven, update the firmware to get the best performance. These steps help you get the right curing every time.
Pro tips for perfect curing: Always double-check your oven’s temperature before each batch. This small step can save you from wasted transfers.
Uneven curing can cause weak spots in your transfer. You might see some powder that looks dull or does not stick well. To fix this, follow these steps:
Clean the oven’s ventilation ducts and vents. Good airflow helps the heat spread evenly.
Apply the powder in a thin, even layer. Avoid using too much or too little.
Rotate the tray halfway through curing if you use a tray oven. This helps all sides get the same heat.
Control the room’s humidity and temperature. High humidity can affect how the powder melts.
Use an infrared thermometer to check for even heat. Place it near the film to get the most accurate reading.
Wipe the oven’s chamber walls and check the heating elements. Replace any old parts if needed.
Test the oven seals for leaks. Reseal or re-level the tray rails if you find any problems.
These steps help you fix uneven curing and get strong, smooth transfers.
If you still see problems, try running a heat map scan to spot trouble areas inside the oven.
Sometimes, the powder sticks to the tray or the film does not lift off cleanly after curing. You can prevent this by always using fresh parchment paper under your film. Make sure the tray is clean and free from old residue. If you notice sticking, let the film cool longer before you try to move it. Use heat-resistant gloves or tongs to handle the hot tray safely.
A lint-free cloth helps you wipe away dust before you start. This keeps the powder from clumping or sticking in the wrong places. If you still have trouble, check the oven temperature again. Too much heat can make the powder too sticky, while too little heat can leave it dry and loose.
Tips: Keep your tools and workspace clean. This simple habit helps you avoid most sticking problems during curing.
You want to set yourself up for success before you start the curing process. Use this table to check each important aspect:
Aspect to Check | Details and Importance |
|---|---|
Ink Quality | Use high-quality inks for bright, long-lasting prints. |
Curing Temperature | Set your oven between 320-350°F (160-177°C) for proper melting and adhesion. |
Curing Time | Keep curing time between 2–3 minutes to avoid peeling or texture problems. |
Equipment Selection | Pick the right oven or curing tool for your batch size and material. |
Manufacturer's Instructions | Follow all guidelines for temperature, time, and method. |
Monitoring | Watch temperature and timing closely to prevent defects. |
Ventilation | Make sure your workspace has good airflow for safety. |
Cooling and Handling | Plan to let your film cool before peeling or handling. |
Tip: Double-check your oven temperature with a thermometer before you begin. This step helps you avoid undercuring or overcuring.
Stay alert while your film is in the oven. Here are the steps you should follow:
Place your film ink-side up on a heat-resistant tray with parchment paper underneath.
Set a timer for 2–3 minutes. Do not leave the oven unattended.
Watch for the powder to melt and turn smooth and glossy.
Rotate the tray halfway through if you use a tray oven. This helps the heat reach every part of your film.
Keep an eye on the temperature. Adjust if you see any hot or cold spots.
Use heat-resistant gloves when handling trays.
Note: If you see smoke or smell burning, lower the temperature right away. This can prevent overcuring and save your print.
Once the curing process ends, you need to finish strong:
Remove the tray from the oven using gloves or tongs.
Place the film on a flat, heat-safe surface to cool.
Wait until the film feels cool to the touch before moving or stacking it.
Check the surface for a smooth, matte finish. The powder should look clear and feel dry.
Store your finished film in a clean, dust-free area until you are ready to press it onto fabric.
Clean your tools and workspace to get ready for the next batch.
Tip: Letting your film cool fully helps the powder bond well and gives you a strong, lasting transfer.
You now know the key steps for curing DTF powder with a DTF oven. Set the right temperature and time for each batch. Use the checklist and troubleshooting tips to avoid mistakes. Practice often to improve your results. By perfecting your curing process, you will create strong and lasting transfers. Stay patient and keep learning with each process. Your prints will look better every time.
You should see a smooth, matte, and clear finish. The powder will not look grainy or powdery. Touch the surface gently. It should feel dry and not sticky. If you see any loose powder, cure it a bit longer.
You should use fresh parchment paper for each batch. Old paper can leave marks or cause sticking. Clean parchment paper helps you get smooth, clean transfers every time.
High temperatures can overcure the powder. You may see cracks, yellowing, or a rough surface. The transfer may not last long. Always check your oven temperature before you start.
Most prints need 2–3 minutes. Thicker powder layers may need a few extra seconds. Always check the powder and adjust the time if needed. Use a timer for best results.
Yes, you can cure several films at once. Space them apart so they do not touch. This helps the heat reach every film evenly. Do not stack films on top of each other.
Powder sticks when you skip parchment paper or use a dirty tray. Always use clean parchment paper under your film. Let the film cool before you remove it from the tray.
If the powder feels gritty, cure it for another 20–30 seconds. Check your oven temperature. Make sure you use the right amount of powder. Too much powder can make curing harder.
You should not use a kitchen oven for DTF curing. DTF powder can release fumes. Use a dedicated DTF oven with good ventilation. This keeps your workspace safe and your food oven clean.


