Views: 0 Author: Site Editor Publish Time: 2025-11-19 Origin: Site


You need your uv printer to work well every time, but problems can stop your work. Many people have the same problems like curing problems, color transfer issues, adhesion issues, and special needs for good print quality. These problems often include printhead issues, print quality problems, ink sticking problems, and curing process troubles.
Most uv printing problems are easy to fix. You can usually solve them with simple troubleshooting steps.
Clean your UV printer often to stop nozzle clogs and keep prints looking good. Use the right cleaning tools and solutions.
Watch how long the UV lamp has been used. Change it when it gets old to make sure prints dry well and stick right.
Set up your printer often and look at materials before you print. This helps stop colors from looking wrong and edges from getting blurry.
There are many signs when your uv printer has nozzle clogs. These signs help you find problems early and keep printing easy.
Ink will not come out of the nozzle.
The printhead holes look blocked up.
Prints show light colors in some spots.
Nozzles stop making ink marks.
Inside the nozzle, channels get blocked.
The table below lists common problems and why they happen:
Symptoms of Nozzle Clogging | Causes |
|---|---|
Ink not flowing from nozzles | Ink dries too fast |
Printhead holes obstructed | Not cleaning the printer |
Light color patterns | Bad quality ink |
Nozzles not producing ink | Printer sits unused |
Clogged nozzle channels | Weather or room conditions |
Nozzle clogs can happen for many reasons. Ink that is too thick or too thin can block the nozzle. Changes in temperature can change how ink moves. If the air is dry and hot, ink dries on the print head. If the air is very wet, ink can build up around the nozzle. Changing ink often can also cause clogs. The best place for your uv printer is 22-25°C and 40-70% humidity.
You can fix clogs by cleaning the nozzle. Use polyester swabs and cleaning liquid to wipe the printhead bottom. Always use wipes that do not leave lint and clean in one way. Check and clean the wiper and capping station often. Automatic cleaning helps stop clogs. Clean your printer often and use it a lot to keep the nozzle clear. These steps help you avoid problems and keep your uv printer working well.
You can spot incomplete curing in your prints by checking a few key signs:
The surface feels sticky or soft instead of hard.
The print looks cloudy or hazy, not clear.
The color appears uneven or has strange spots.
The print cracks easily, which may mean it is overcured.
If you notice these problems, your uv printer may not be curing the ink properly. Sticky or smudged prints often mean the curing process did not finish.
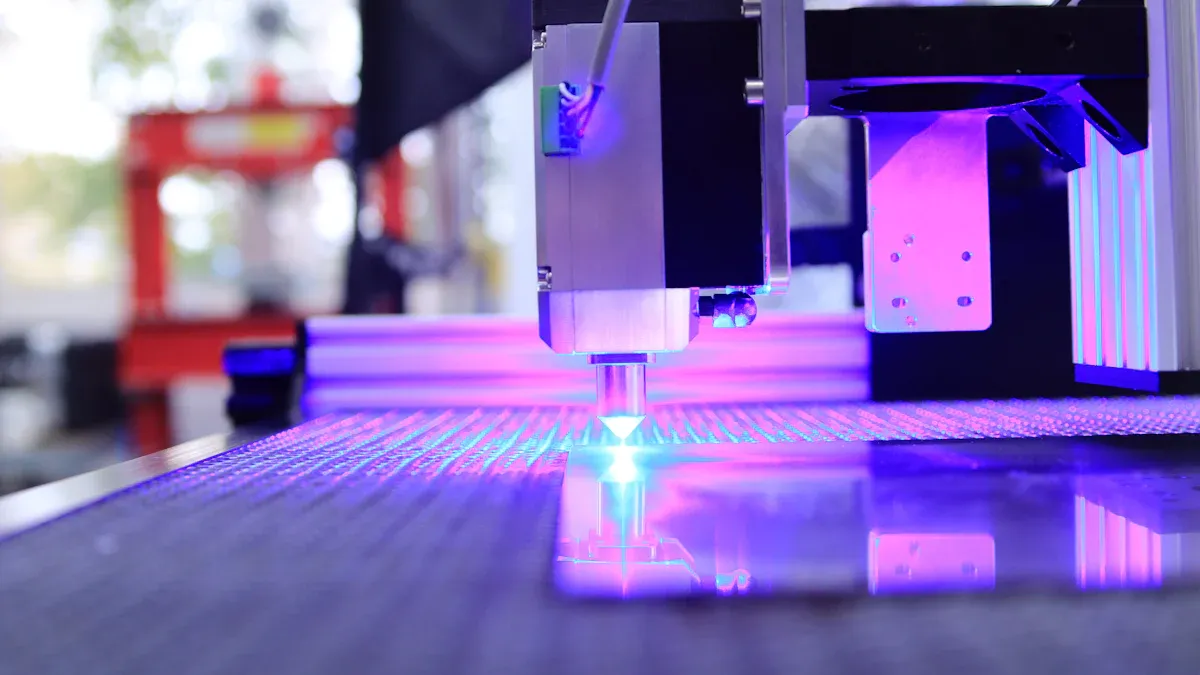
The uv lamp is important for uv printing. As the lamp ages, its light gets weaker. This lower intensity makes curing slower and less effective. You may see poor adhesion or prints that do not last as long. Most uv lamps last between 400 and 1000 hours. Some users change their lamps after 400 to 500 hours, while others reach up to 750 hours. When the lamp gets old, the printer may show a message to replace it. If you use the lamp for too long, the curing quality drops by about 30% after 10,000 hours.
You can fix curing issues with a few simple steps:
Check the uv system to make sure it is clean and working at full power.
Look at the ink and see if it matches the printer’s needs.
Try slowing down the print speed to give more time for curing.
Test the ink directly on the material to check for problems.
Replace the uv lamp when it reaches the end of its life.
Tip: Regular cleaning and using high-quality ink help prevent many curing problems. Always follow the printer’s maintenance schedule for the best results.
Sometimes, your uv printer does not print the same color each time. This is called color inconsistency. Many things can cause this problem.
Problems with image processing can change colors. Your computer screen might show colors differently than your printer.
Ink quality matters for color consistency. Bad ink can make colors look strange or uneven.
Humidity and temperature affect how ink dries. These changes can make colors look different in your prints.
A stable uv printer gives better color results. If your printer shakes or moves, colors may change.
The material you print on also affects color. Dark backgrounds or different types of media can make colors shift.
Blurry edges or ghosting can make prints look messy. You might see ghosting or lines that do not match up when printing many colors.
The material might not be flat on the printer bed. This can cause blurry edges or ghosting.
If the surface is bent or not clamped well, ghosting and uneven prints can happen.
Calibrating the print bed often keeps edges sharp. Alignment tests built into the printer help stop misalignment.
Tip: Always check your material before you print. Make sure it is flat and secure to avoid ghosting and misalignment.

You can fix color inconsistency and blurry edges by using calibration methods. The table below shows some ways to help:
Calibration Technique | Description |
|---|---|
Color Calibration Tool | Measure print colors with standard samples. |
ICC Color Profile | Use the right profile for true colors. |
Print Sample Comparison | Match colors by comparing samples. |
Observation Under Different Lights | Look at prints in different lights. |
Professional Evaluation | Ask a designer to check color accuracy. |
Multiple Angle Observation | Look at prints from different angles. |
Inks and Materials | Match ink and materials to printer settings. |
Print Mode | Pick high-quality mode for better colors. |
Color Management Software | Use software to adjust printer colors. |
Printhead Cleaning | Clean the printhead often to stop color problems. |
Device Calibration | Calibrate your printer often for good results. |
Most uv printing problems can be fixed by following these steps. Calibrate your printer and handle materials carefully to avoid ghosting and misalignment. Clean the printhead and use good ink for better color consistency.
Sometimes, prints peel or scratch off easily. This means the ink does not stick well. The ink might not match the material. The surface may not be ready for printing. If you use the wrong ink or skip surface treatments, ink will not stick. Different materials need special ink formulas. Some need pre-treatments. Dirty hands, oil, or dust can stop ink from sticking.
Common reasons for poor ink adhesion are:
Ink does not match the material.
The surface is not treated before printing.
Grease or moisture is on the material.
Other things that affect adhesion:
Not cleaning or roughening the surface.
Using the wrong resin in the ink.
Curing is not finished.
Temperature or humidity changes.
Ink can crack or fall off after printing. This happens on glass, ceramics, plastics, or metals. Sunlight can break down the ink. Water or ice can make the ink weak. Heat can bend the surface and make ink peel. UV light and temperature changes hurt the ink. Moisture can blur or fade the print. It makes the ink easy to rub off.
You can make ink stick better by preparing the surface. The table below shows some ways to help:
Method | Description |
|---|---|
Cleaning and Decontamination | Remove oils, fingerprints, and residues with solvents. Let the surface dry all the way. |
Surface Energy Modification | Use corona, plasma, or flame treatments to help ink stick. |
Mechanical Surface Modification | Light abrasion or sandblasting makes the surface rougher for better adhesion. |
Always match the ink to the material. Control the temperature and humidity in your workspace. These steps help you avoid adhesion problems and get good results from your uv printer.
Material jams can stop your uv printer and waste supplies. You might see wrinkled films or notice that the material feeds unevenly. Sometimes, the printer stops because the film or sheet gets stuck. You should always check the film roll before loading. Make sure the edges are straight and the roll sits flat. If you see any skewed feeding or jams, pause the job and look for the cause.
Common reasons for material jams include:
Wrinkled or damaged films
Skewed feeding of the material
Incorrect tension on the film roll
Dust or sticky residue on rollers and guides
Tip: Clean the rollers and guides often. Dust or adhesive buildup can increase friction and cause jams.
When the print head does not move, you cannot finish your uv printing job. Several things can cause this problem.
The guide rail beam may not be level, which puts uneven force on the print head carriage.
Dirt or debris inside the guide rail can slow or block movement.
The lead screw might have cracks or dirt, making the print head move unevenly.
Problems with the belt, like breaks or aging, can stop the carriage from moving.
Grating strips can fail if they get dusty or damaged, causing errors in positioning.
The control card board may have hardware faults, which can stop the print head from working.
You can fix most jams by following a few steps:
Stop the printer and remove any stuck material gently.
Check the film roll for straight edges and proper storage.
Adjust the feeding tension so the material moves smoothly.
Clean the rollers and guides to remove dust or sticky ink.
Inspect the guide rail and lead screw for dirt or damage.
Replace worn or broken belts and grating strips.
If the print head still does not move, check the control card board or call a technician.
Note: Regular cleaning and careful setup help prevent most jams and movement issues in your uv printer.
White ink settles faster than colored inks. This is because it has titanium dioxide, which is heavy. The heavy part sinks to the bottom quickly. If the ink is not good quality, it can make clogs and lumps. Using the wrong print settings can make prints look grainy. The table below explains why white ink settles:
Cause | Explanation |
|---|---|
Titanium Dioxide Characteristics | White ink has heavy parts that sink faster than colored ink. |
Poor Ink Quality | Bad ink can have lumps and dirt, which cause clogs. |
Printing Curve Mismatch | Wrong print settings make big drops and more settling. |
If ink flow is not steady, you may see missing spots or lines. Air bubbles in the ink line can cause this problem. Nozzles can dry out if not used. Flush the nozzles before you print each day. Run the automatic moisturizing after you finish printing. Always check ink levels so air does not get in. Clean the capping station and wiper blade every week. Change filters if they get clogged. The table below shows what to do to keep ink flow steady:
Frequency | Task Description |
|---|---|
Daily | Flush nozzles once or twice before printing. |
Daily | Use automatic moisturizing after printing to stop drying. |
Daily | Watch ink levels to keep air out of the ink line. |
Weekly | Clean the capping station, wiper blade, and waste pad with soft cloths and cleaning fluid. |
Weekly | Check and change clogged filters (10μm/5μm is best). |
Run white ink circulation every day to stop buildup.
You can fix these problems by doing a few steps. Get a cleaning solution and a plastic straw. Move the printhead carriage out of the way. Put cleaning fluid on the sponge pad under the printhead with a dropper. Wait about 10 to 15 minutes for the fluid to work. Clean the printhead again and see if it is better. Make sure ink tubes are tight and check for leaks.
Tip: Clean your printer often and do daily care. This helps stop most nozzle and ink flow problems with uv printers.
You can help your uv printer work well by taking care of it often. Most problems are easy to fix if you clean and check the ink. Do simple checks every day and keep your printer in a clean place. Always have your manual close so you can look up answers when you need help.
You should clean the printhead often. Use the right cleaning solution. Print regularly to keep ink flowing. Store your printer in a clean, stable environment.
Your UV lamp may be weak or old. Replace the lamp if needed. Check your curing settings. Use high-quality ink for better results.
Prepare the surface before printing. Clean it well. Use the correct ink for your material. Control temperature and humidity in your workspace.


